I have installed ubuntu using wubi and want to create a boot cd...how can I do this without downloading the iso file....
Asked
Active
Viewed 3,000 times
4 Answers
2
The live CD is usually created with a filesystem called squashfs. Squashfs is read only compressed filesystem that allow us to squeeze our system into a single CD. Note that your system has to be about 2GB (this might need some trial an error) to produce a compressed image that fits on the CD. Otherwise, you will have to use a DVD
Creating a live CD from an existing/new installation
Follow the procedure to create a live cd from your current installation.
Set up some variables:
export WORK=~/temp
export CD=~/livecd
export FORMAT=squashfs
export FS_DIR=casper
Replace ~/temp with a path to a temporary directory in which we will work in. Replace ~/livecd with a path to the CD tree.
Make the folder structure.
sudo mkdir -p ${CD}/{${FS_DIR},boot/grub} ${WORK}/rootfsNow we will need to install some packages:
sudo apt-get update && sudo apt-get install grub2 xorriso squashfs-toolsNow we will copy the current installation, modify the exclude flags to fit your needs:
sudo rsync -av --one-file-system --exclude=/proc/* --exclude=/dev/* \
--exclude=/sys/* --exclude=/tmp/* --exclude=/home/* --exclude=/lost+found \
--exclude=/var/tmp/* --exclude=/boot/grub/* --exclude=/root/* \
--exclude=/var/mail/* --exclude=/var/spool/* --exclude=${WORK}/rootfs \
--exclude=/etc/fstab --exclude=/etc/mtab --exclude=/etc/hosts \
--exclude=/etc/timezone --exclude=/etc/shadow* --exclude=/etc/gshadow* \
--exclude=/etc/X11/xorg.conf* --exclude=/etc/gdm/custom.conf \
/ ${WORK}/rootfs
Note -If you have a separate boot partition, execute this: sudo cp -av /boot/* ${WORK}/rootfs/boot
Note-If you want to copy settings and some files from the home directory then First, define what directories we want to copy:
CONFIG='.config .gconf Desktop "some-other-folder" "and-another-folder"'
And now we copy that:
    cd ~ && for i in $CONFIG
    do
    sudo cp -rpv --parents $i ${WORK}/rootfs/etc/skel
    done
Nautilus stores its settings in a directory called .config in the home directory, so I added .config to the variable $CONFIG:
Now we chroot into the new system and modify it.
sudo mount  --bind /dev/ ${WORK}/rootfs/dev
sudo mount -t proc proc ${WORK}/rootfs/proc
sudo mount -t sysfs sysfs ${WORK}/rootfs/sys
sudo mount -t devpts devpts ${WORK}/rootfs/dev/pts
sudo chroot ${WORK}/rootfs /bin/bash
The next commands are done in chroot:
LANG=
apt-get update
apt-get install casper
Casper contains live scripts. If you want an installer too, run this:
apt-get install ubiquity ubiquity-frontend-gtkOr if you want KDE:
apt-get install ubiquity ubiquity-frontend-kdeUpdate modules.dep and initramfs:
depmod -a $(uname -r)
update-initramfs -u -k $(uname -r)
Remove non-system users - do not worry, we have copied the settings and data into the "skeleton" of users. That means all new users will have them.
for i in `cat /etc/passwd | awk -F":" '{print $1}'`
do
    uid=`cat /etc/passwd | grep "^${i}:" | awk -F":" '{print $3}'`
    [ "$uid" -gt "999" -a  "$uid" -ne "65534"  ] && userdel --force ${i} 2>/dev/null
done
Clean up:
apt-get clean
find /var/log -regex '.*?[0-9].*?' -exec rm -v {} \;
find /var/log -type f | while read file
do
    cat /dev/null | tee $file
done
rm /etc/resolv.conf /etc/hostname
Exit chroot.
exitNow, we copy the kernel:
export kversion=`cd ${WORK}/rootfs/boot && ls -1 vmlinuz-* | tail -1 | sed 's@vmlinuz-@@'`
sudo cp -vp ${WORK}/rootfs/boot/vmlinuz-${kversion} ${CD}/boot/vmlinuz
sudo cp -vp ${WORK}/rootfs/boot/initrd.img-${kversion} ${CD}/boot/initrd.img
sudo cp -vp ${WORK}/rootfs/boot/memtest86+.bin ${CD}/boot
If you have installed the installer, you will need to do this, so that the installer doesn't install things like casper:
sudo chroot ${WORK}/rootfs dpkg-query -W --showformat='${Package} ${Version}\n' | sudo tee ${CD}/${FS_DIR}/filesystem.manifest
sudo cp -v ${CD}/${FS_DIR}/filesystem.manifest{,-desktop}
REMOVE='ubiquity casper user-setup os-prober libdebian-installer4'
for i in $REMOVE
do
    sudo sed -i "/${i}/d" ${CD}/${FS_DIR}/filesystem.manifest-desktop
done
Unmount what we have mounted:
sudo umount ${WORK}/rootfs/proc
sudo umount ${WORK}/rootfs/sys
sudo umount ${WORK}/rootfs/dev/pts
sudo umount ${WORK}/rootfs/dev
Convert to squashfs:
sudo mksquashfs ${WORK}/rootfs ${CD}/${FS_DIR}/filesystem.${FORMAT}Make filesystem.size:
echo -n $(sudo du -s --block-size=1 ${WORK}/rootfs | tail -1 | awk '{print $1}') | sudo tee ${CD}/casper/filesystem.sizeAnd md5:
find ${CD} -type f -print0 | xargs -0 md5sum | sed "s@${CD}@.@" | grep -v md5sum.txt |sudo tee ${CD}/md5sum.txtNow grub.cfg:
sudo nano ${CD}/boot/grub/grub.cfg(replace nano with your fav text editor, it doesn't matter) Paste this and save:
set default="0"
set timeout=10

menuentry "Ubuntu GUI" {
linux /boot/vmlinuz boot=casper quiet splash
initrd /boot/initrd.img
}


menuentry "Ubuntu in safe mode" {
linux /boot/vmlinuz boot=casper xforcevesa quiet splash
initrd /boot/initrd.img
}


menuentry "Ubuntu CLI" {
linux /boot/vmlinuz boot=casper textonly quiet splash
initrd /boot/initrd.img
}


menuentry "Ubuntu GUI persistent mode" {
linux /boot/vmlinuz boot=casper boot=casper persistent quiet splash
initrd /boot/initrd.img
}


menuentry "Ubuntu GUI from RAM" {
linux /boot/vmlinuz boot=casper nopersistent toram quiet splash
initrd /boot/initrd.img
}

menuentry "Check Disk for Defects" {
linux /boot/vmlinuz boot=casper integrity-check quiet splash
initrd /boot/initrd.img
}


menuentry "Memory Test" {
linux16 /boot/memtest86+.bin
}


menuentry "Boot from the first hard disk" {
set root=(hd0)
chainloader +1
}
Make the CD/DVD!
sudo grub-mkrescue -o ~/live-cd.iso ${CD}Test it using a virtual machine!
All credit goes to capink, because the guide is from here.
I copied it from here and made a few edits
-
This will get you something that approximates the installer, though if you have added any packages since installing, the created image will be too large to fit on a cd. – psusi May 17 '12 at 17:27
-
@psusi then put it on a dvd – Ashu May 17 '12 at 18:17
-
Oh thank you all very much...but i am just new to linux distros and dont now how to this coding stuff...is it possible through another method, where we dont need programming? – Meet Vora May 18 '12 at 11:58
-
i dont think this is possible any other way.... – Ashu May 18 '12 at 12:01
1
If you want to make your existing installation into a Bootable CD, here is a very detailed and easy to follow instruction.
If you want to simply obtain an original Ubuntu ISO from an installed system, I have no idea still now (It may be impossible) .
You can also see this short answer about creating Live CD from existing installation.
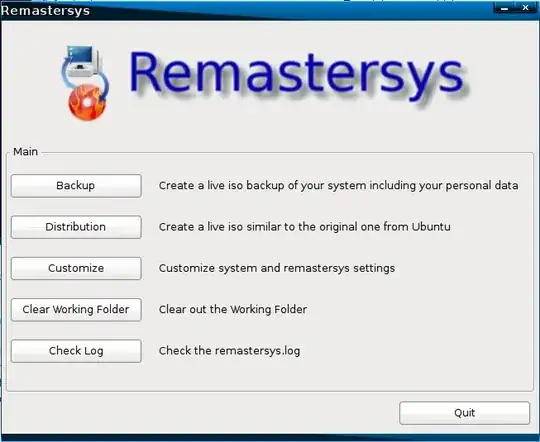
Detail instruction of using remastersys software You can do this by installing remastersys.
Open your terminal, type sudo su and enter.
type wget -O - http://www.remastersys.com/ubuntu/remastersys.gpg.key | apt-key add - and press enter and type your password.
type again sudo gedit /etc/apt/sources.list and in the new opened file add this line at the end of the file.
deb http://www.remastersys.com/ubuntu precise main save and close the file.
If you are using Ubuntu 11.10(Oneiric), replace precise with oneiric. for Ubuntu 11.04(natty) replace precise with natty.
Then run sudo apt-get update in the terminal & sudo apt-get install remastersys.
This will install remastersys software, which can be used to create a CD from your installed system.
Go to this page for instruction.
-
Oh thank you all very much...but i am just new to linux distros and dont now how to this coding stuff...is it possible through another method, where we dont need programming? – Meet Vora May 18 '12 at 11:58
-
0
You can't. You need the iso to make the official cd.
psusi
- 37,551
-
-
Oh thank you all very much...but i am just new to linux distros and dont now how to this coding stuff...is it possible through another method, where we dont need programming? – Meet Vora May 18 '12 at 11:58
-
@MeetVora The ISO is the easiest way. Just download it and burn it to a disk. No coding required... – nanofarad Aug 18 '12 at 16:37
0
Yes ,you can use remastersys for it ,
Note: It is just backup existing ubuntu installation ,It can't create original ubuntu cd
Tachyons
- 17,281
-
Oh thank you all very much...but i am just new to linux distros and dont now how to this coding stuff...is it possible through another method, where we dont need programming? – Meet Vora May 18 '12 at 11:58
-