1) Get the path of your drive
First, open GParted or Disks and fetch the device path of your HDD (see the screenshot below):
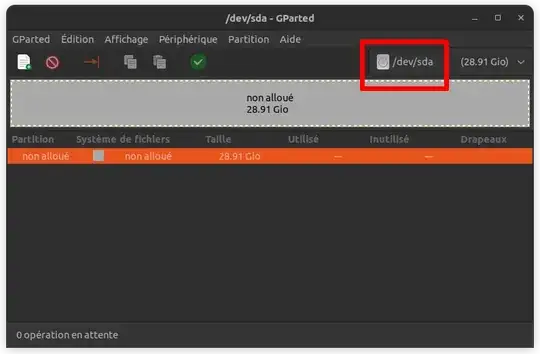
Here the HDD is at /dev/sda.
2) Backup your data if possible
It is highly recommanded to create an image of your HDD before attempting any rescue.
To create an image, use Disks. Select your HDD at /dev/sda then click on the 3 vertical dots (disk options) and "Create a disk image…".
3) Use Test Disk to recover your lost partitions
Install Test Disk with:
sudo apt install testdisk
Then run it for your drive with /dev/sda, the path you fetched on the first step:
sudo testdisk /dev/sda
- You’ll have to confirm the media, press ENTER on
[Proceed] for /dev/sda,
- Then choose the right partition table type. In your case it’s
[EFI GPT]. ↓ and ENTER,
- Choose
[ Analyse ] and ENTER.
- ENTER on
[Quick Search].
- Now Test Disk is showing your lost partitions. Press ENTER to continue
- If you have found all your lost partitions, → and ENTER on
[ Write ]. If you haven’t found them, try a [Deeper Search].
- Confirm with Y and ENTER on
[Ok]
- Reboot or unplug and plug your drive A
Hurray, all your partitions are back !

dddoesn’t even check if there is enough space on the destination. Should be totally avoided in 2023 :) – Zatigem Aug 13 '23 at 18:19ddoverlooking partitions, volumes, data structures and data while truly writing an exact disk image to file … Other tools have their "optimized" ways of copying disks/partitions that are not necessarily useful in such cases of data recovery … See for example https://askubuntu.com/a/1479247 … I haven’t looked into the source code of the Gnome disks utility’s disk imaging tool though to know for sure, but the odds it does some optimizations too. – Raffa Aug 14 '23 at 15:29