I have an Epson GT-S80 which I couldn't get to work.
After going through a number of answers I've finally found a process that worked perfectly
Try this....
Installing an Epson GT-S80 (I'm sure this would work for others)
1 – Check whether computer is a 32 or 64 bit configuration
(Terminal) $ uname -a <enter>
x86 = 64b 1386 = 32 bit
2 – make sure Scanner is attached to the pc & switched on
Locate product id
(Terminal) $ lsusb <Enter>
Probable result = ID 04B8:0136
3 – Ensure user is in scanner group
(Terminal) $ id <Enter>
You are looking for 109 (Scanner). If not there, type in the following command
(Terminal) $ sudo adduser XXXX scanner <Enter> (Where XXXX = the username)
Restart computer and Recheck
(Terminal) $ id <Enter>
4 – Set Device ID for Sane Daemon
(Terminal) $ sudo leafpad /etc/sane.d/epson* <enter> (A window full of text will jump-up)
on the line that has # usb 0x4b8 0x110
Remove the # and change the 110 to 136 (assuming that was the id you identified earlier)
Should now look like : usb 0x4b8 0x136
Save the file and close
now
(Terminal) $ sudo leafpad /etc/sane.d/epson.conf <enter>
At the bottom do the same thing with the #usb line
Also remove the comment (#) symbols on the lines that read
usb /dev/usbscanner0
usb /dev/usb/scanner0
Save and close the file
Now
(Terminal) $ sudo leafpad /etc/sane.d/dll.conf <enter>
place comment (#) tags before both epson entries
#epson
#epson2
Save & close the file
5 – Empty your downloads file.
This will prevent confusion later
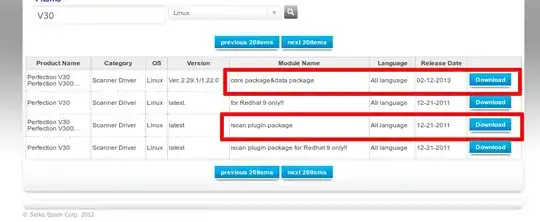
5 – Download the Iscan software
From the epson website
You need three files from the site
Google Epson linux drivers which will bring up the correct download site
Start with the core package & data package
Accept then download (save file) deb file with ltdl7 for whichever system configeration you identified earlier
Then download & save iscan-data_1.28.0-2_all.deb file
Return to download center & go into iscan plugin package
Accept then download the .deb package for whichever system configuration you have
6 – CD to the downloads folder
(Terminal) $ cd Downloads <enter>
you should see path change to ~/Downloads$
If you type ls into the terminal you should see only the three files you've downloaded. This is why you emptied it earlier
7 – Install the dependency (it won't work if you don't)
(Terminal) $ sudo apt-get install xsltproc <enter>
8 – Install iscan pakages
(Terminal) $ sudo dpkg -i * <enter>
9 – Run program
If you get the 'Could not send command to scanner Check the scanner's status' error
Disconnect the scanner & switch off, restart pc, reconnect and turn back on everything.
10 – lastly
You can fix a number of installation errors using the following simple code
(Terminal) $ sudo apt-get -f install <enter>
Should now work.
sudo apt-get -f installfrom the terminal to try to fix dependency issues. – ish Sep 20 '12 at 08:08dpkg -i filename.debIf you are root this installs the .deb package. – NlightNFotis Sep 21 '12 at 06:11