OK.
This is a problem when a Laptop comes with already 4 primary partitions in MBR (cuz GPT has not this limit).
MBR has this limit where you cannot create another primary partition when 4 of them already exists.
I bet that your friend(s) laptop have 4 primary partitions. Usually 2 for Windows and 2 are 1) HP-Tools and 2) The Recovery partition.
The easy way is to delete one of the partitions, for example: Recovery Partition - (BUT you will LOSE the ability to recover your Windows) or Hp-tools (but sometimes are useful).
Here is the way on how to install Ubuntu when you already have 4 primary partitions and you don't mind to delete one: My disk already has 4 primary partitions, how can I install Ubuntu?
The hard way is to convert the Windows C: partition from primary to Logical.
When you do this , you will be able to create Logical partitions and install Ubuntu normally.
So our goal here is to convert the Windows C: primary partition to Logical and to resize the C: partition to leave a space for Ubuntu installation.
Now take a big breath and read carefully.
First of all we must defragment the hard disk to avoid mistakes and tough situations. After defrag finish we proceed.
Boot in to Windows and download the free version of Partition Wizard and install it.
When installation finish , open the application as an Administrator. (right click and open as administrator)
Select the Windows C: partition and right click and modify and select "Set partition as Logical"

Then a window with 3 options will pop-up . We must select the option with the reboot. . The conversion will be done during reboot , as it cannot be done when partition is mounted.
When the process of conversion finish , it will boot again in Windows. We open again the Partition Wizard (as administrators).
Now we want to resize the C: partition. So we select the C: partition and then we select move/resize.
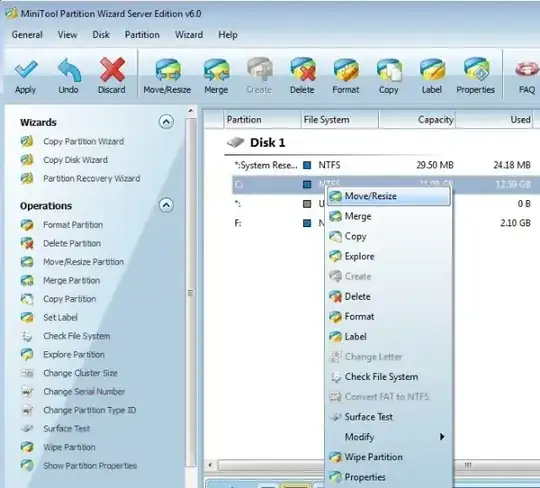
Resize the partition always from the end to begin (and never from the begin , cuz there are critical Windows files) and again a window with 3 options will pop-up. Again we select the option with the reboot inside. Because the resize can be done only when partition is unmounted. (during reboot).
When resize complete successfully it will boot in to Windows again. Now we open for the last time the Partition Wizard (as administrators) and select the Unallocated space and create a NTFS filesystem (Yes NTFS , no matter we will delete it after, but creation of NTFS decrease the possibilities of a mistake as we are in a Windows Environment). After the creation of filesystem it is time to boot in Ubuntu.
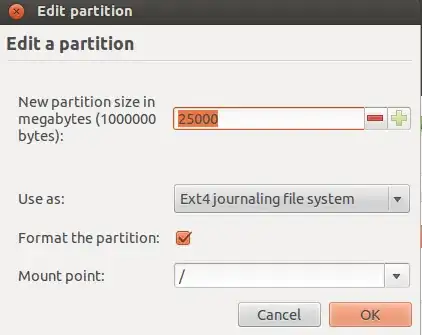
Boot in Ubuntu from the LiveCd/Usb and begin the installation process. When you reach the window with the options , select "Something Else"
Locate the NTFS partition we created and click "change" . Then allocate the space you want (leave some space for the swap partition) and mount it to root.
Do not forget to mark the "Format the partition". Do the same for Swap area.

Enjoy Ubuntu !