158

What all needs to be done to install Android SDK / ADT Bundle on Ubuntu?

Each of the steps in the answer was found on some different forum as I encountered obstacles getting started with my Android SDK and posted questions in appropriate forums thereafter. So I thought this would be useful in that it is a one stop solution available, in case one ever needs to re-install Ubuntu and install the Android SDK / ADT Bundle from scratch!

Braiam
  • 67,791
  • 32
  • 179
  • 269
Karthik C
  • 2,827
  • What's a "Android Development Environment"? – Braiam May 15 '14 at 15:23
  • 3
    Apparently it's easier for some people to rant than to just answer the question. So, here's the answer; http://www.webupd8.org/2012/09/install-oracle-java-8-in-ubuntu-via-ppa.html?m=1 & http://www.webupd8.org/2014/05/install-android-studio-in-ubuntu-via-ppa.html?m=1 – C.Jacobs May 15 '14 at 18:49

6 Answers6

129

Actually, I think you should use Android Studio to develop android application. However, if you have your reason to use eclipse, you can follow the following guide.

Target     : Super Newbies
IDE        : Eclipse
Description: Provide a GUI method to install Android IDE using Eclipse

1. Installing Java Runtime (JDK) and Eclipse IDE

  • Search Software on Ubuntu and launch Ubuntu Software Center

    Searching

  • Search Java on Ubuntu Software Center and then install the OpenJDK Java Runtime.

    enter image description here

  • Search Eclipse on Ubuntu Software Center and then install it.

    enter image description here

  • If you have successfully installed eclipse and JDK, it will appear in the search result on your computer.

    enter image description here enter image description here

  • For the JDK, you can also press CTRL + ALT + T to open a terminal and type command java -version to check again.

    enter image description here

  • Tips : Lock the eclipse icon on launcher.

    enter image description here


2. Downloading SDK

  • Go to http://developer.android.com/sdk/index.html to download the latest version of SDK. enter image description here

  • Scroll down and click DOWNLOAD FROM OTHER PLATFORMS enter image description here

  • Click android-sdk_r22.6.2-linux.tgz under Linux 32 & 64-bit of SDK Tools Only.

    enter image description here

  • Tick I have read and agree with the above terms and conditions and click Download android-sdk_r22.6.2-linux.tgz.

    enter image description here

  • Wait for the download process.

    enter image description here


3. Preparing for Installation

  • Go to the location where you set to download the file.
  • Rigth click the file[.tgz] and select Extract Here.

    enter image description here

  • Now you can see that a file called android-sdk-linux appears as if the following.

    enter image description here

  • Enter the folder android-sdk-linux.

    enter image description here

  • Enter the folder tools and then copy the folder location.

    enter image description here

  • Press the keys CTRL + ALT + T to open a terminal and then use the following command. Where /home/casper/Downloads/android-sdk-linux/tools is the location I copied previously. You can just type cd and right click to past the location to the terminal.

        cd /home/casper/Downloads/android-sdk-linux/tools
        ./android
    

    enter image description here

  • Now the Android SDK Manager will be run.


4. Installing Packages

  • Click Install [Number] packages....

    enter image description here

  • Click Accept License and then click Install.

    enter image description here

  • Wait for the installation process.

    enter image description here

  • Finally, this message will be shown.

    enter image description here


5. Editing ".bashrc"

  • Press CTRL + ALT + T to open a new terminal and type : gedit ~/.bashrc

    enter image description here

  • Now the following text will appear.

    enter image description here

  • Add the following to the top of the entire text and then save it. (Do not close the file)

        export PATH=${PATH}:~/android-sdk-linux/tools
        export PATH=${PATH}:~/android-sdk-linux/platform-tools
    
  • Example :

    enter image description here

  • [Recommended] Move the whole file android-sdk-linux to your eclipse's workspace and under a folder that you create named Android. Moreover, you have to copy the location.

    enter image description here

  • Now back to the ".bashrc" file and the replace the '~' with the location you copied previously and then save it and close it.

    enter image description here

  • Logout and relogin your Ubuntu system.


6. Setting Up an Android Virtual Device

  • Press CTRL + ALT + T and type android avd to open the Android Virtual Device Manager.

    enter image description here

    enter image description here

  • Click New.... Set up like the following and click OK.

    enter image description here

  • Click your virtual device and then click Start....

    enter image description here

  • Click Launch.

    enter image description here

  • Launching your virtual device enter image description here


7. Installing ADT Plugin on Eclipse

  • Start Eclipse and go to Help -> Install New Software...

    enter image description here

  • Click Add....

    enter image description here

  • Type the following and then click OK.

     Name     :    ADT Plugin
     Location :    https://dl-ssl.google.com/android/eclipse/
    

    enter image description here

  • Tick the checkbox of Developer Tools and then click Next>.

    enter image description here

  • Click Next>.

    enter image description here

  • Click "I accept the..." and click Finish.

    enter image description here

  • Wait for the installation process.

    enter image description here

  • Restart eclipse.

    enter image description here

  • Click Open Preferences.

    enter image description here

  • Copy your own SDK location (The location of the file android-sdk-linux).

    enter image description here

  • Paste to the SDK Location: textbox and then click Apply and OK.

    enter image description here

  • Enjoy to create any android application with your Ubuntu.

    enter image description here

Casper
  • 2,998
  • 10
  • 33
  • 56
  • Looks like a nice tutorial, however I would personally just install openjdk-7-jdk, download the ADT (Eclipse including the SDK from android.com) and create a shortcut in the Dash. This way you also have the latest version of Eclipse. – Louis Matthijssen May 15 '14 at 10:11
  • 2
    I just want to provide the easiest way with screenshots for super newbies to set up the environment. I will try you method and post it below =]. – Casper May 15 '14 at 10:18
  • Would you mind if I put my method in an answer below? – Louis Matthijssen May 15 '14 at 10:41
  • Good!! Maybe I can help you add some screenshots – Casper May 15 '14 at 10:42
  • Why do I need to install Eclipse? What if I don't like eclipse? What if I don't have Java installed? Why too many screenshots? – Braiam May 15 '14 at 15:23
  • Because this is just for newbie...Screenshots are important. And I will update the post for Java installation. If you don't like eclipse, you can find other posts and no one force you. =] – Casper May 15 '14 at 15:25
  • I can't copy and paste the commands in the screenshots. The post is heavier (in terms of the amount of data) and will take longer to load. This can be a serious problem for people with slow connections. The post is useless to people using text based browsers or who have disabled the displaying of images. The post is useless for people who have sight problems and are maybe accessing the site using text-to-speech software. Newbies or not is not a reason to overload a post with pointless images. Please, trim it down to the essentially relevant. – Braiam May 15 '14 at 15:49
  • 1
    Why you cannot copy the text? ~.~ I have typed all the commands. Anyway, maybe you are right. – Casper May 15 '14 at 15:54
  • Few tips: using the Android SDK Manager, install Intel x86 Atom System Image for API 19 (latest, all APIs are backwards compatible so don't use old ones) as well. Then use this one to create an AVD. The default image is really slow, it can take 30 minutes to only boot it up and it can use 100% CPU. This is because it is ARM and your system is x86, so it has to emulate everything. Using Intel's image your PC can (probably) make use of your CPU's virtualisation capabilities and it'll boot in less than 10 seconds. Also check Use Host GPU to prevent lag in the AVD. – Louis Matthijssen May 15 '14 at 16:18
  • I really enjoyed this screenshots. Thanks for wonderful work. – sudurais Aug 21 '14 at 00:01
  • 1
    For those of you running 64-bit Ubuntu 14.10, do this sudo apt-get install lib32stdc++6. That's because you need the supporting 32-bit libraries and ia32 is no longer available. Source: http://dandar3.blogspot.mx/2014/03/android-sdk-tools-on-ubuntu-1404-beta.html – An SO User Jan 25 '15 at 18:39
  • a comment just to get a link to this tutorial) – user2950593 Dec 23 '15 at 14:51
  • 2
    @CasperLI Android sdk is now available on Ubuntu repo. sudo apt-get install android-sdk. Can you make a tutorial based on that? – Khurshid Alam Apr 01 '16 at 14:29
  • Answer is very good but I think you should edit this cause it is outdated –  Dec 18 '17 at 17:51
  • Hello, I have managed to install the Android SDK thanks to the response of the user @Kin. I only have one question, is it necessary to install eclipse to develop with cordova and Phonegap? If necessary, why is it necessary? – Miguel Espeso Feb 17 '19 at 18:31
  • 1
    I think the tutorial is outdated now. i.e. ./android doesn't work anymore. – Sid Mar 31 '19 at 07:39
105

Step 1

Check in System Settings -> Details, whether your Ubuntu is 32-bit or 64-bit


Step 2

(Using software centre or command lines) If your Ubuntu is a 32-bit OS then install libgl1-mesa-dev

<p>In case of 64-bit OS install <code>ia32-libs</code> (Ubuntu 13.04 or earlier), or <code>libgl1-mesa-dev:i386</code> (Ubuntu 13.10 and above)</p>

Step 3

Install openjdk-8-jdk. If not compatible try openjdk-7-jdk, or if still not compatible openjdk-6-jdk


Step 4

Download the Android SDK command line tools here (they're located at the bottom of the page) and unzip it to a place where you can leave it as long as you need the Android SDK, /opt/ for instance.


Step 5

Check that the unzipped ADT Bundle folder (or Android SDK folder, as the case may be) have the folders tools and platform-tools. If platform-tools folder is absent, you should be able to install it from the android virtual device manager, which can be run by typing the command

   android
<p>in the terminal. These folders contain some important commands stored. Add them to your executable path. Adding them to the path can be done as follows:</p>

<p>First execute <code>gedit ~/.pam_environment</code>. A file opens. Just add these lines to that file:</p>

   PATH DEFAULT=${PATH}:/path/to/tools
   PATH DEFAULT=${PATH}:/path/to/platform-tools
<p>Here you have to replace <code>/path/to/tools</code> and <code>/path/to/platform-tools</code> by the absolute paths according to where you unzipped the SDK or the ADT bundle download. Now all the commands <code>adb</code>, <code>android</code>, <code>emulator</code> etc can be simply executed in the terminal without giving absolute paths. That is, you will not get a "command not found" error if you gave it without its absolute path.</p>

Step 6

Type android into the terminal and, if Step 5 was done correctly, the Android SDK Package Tool will start, where you can finish your installation.

Karthik C
  • 2,827
6

This may seem to be a long answer, but I tried to explain every step as detailed as possible so nothing can go wrong. You can set this up in less than 5 minutes, even as a beginner.


  1. You'll need Java to use Eclipse, so install it first:

    Eclipse is an IDE. The Android ADT package is being bundled with the Eclipse IDE by default. You can also choose to use another IDE (for example NetBeans) if you prefer, but because Eclipse is the default I'll cover only Eclipse in this tutorial.

    1. Open a terminal

      Search for it in your Dash or press CTRL + ALT + T

      Terminal

    2. Execute the following commands:

      sudo apt-get update
      sudo apt-get install openjdk-7-jdk
      

      Check if you see any errors on your screen, then continue.

  2. Now download the Android ADT bundle (this is Eclipse + the Android SDK):

    1. Click here to go to the download page.
    2. Click on Download the SDK (ADT Bundle for Linux)
    3. Check I have read and agree with the above terms and conditions
    4. Select your architecture:

      How can I check this?

      • Check 32-bit if you've a 32-bit Ubuntu
      • Check 64-bit if you've a 64-bit Ubuntu
    5. Click on Download the SDK ADT Bundle for Linux
  3. Install the Android ADT bundle:

    1. Open the .zip file you've just downloaded
    2. Extract all files to a directory, for example:

      ~/ADT
      

      After extraction this directory should contain 2 other directories:

      ~/ADT/eclipse
      ~/ADT/sdk
      
  4. Add the platform-tools binaries to your $PATH:

    This is not neccesary, it'll make commands like adb accesible from a terminal.

    1. Open a terminal
    2. Execute the following command:

      nano ~/.profile
      
    3. Add the following line on top:

      PATH="$HOME/ADT/sdk/platform-tools:$PATH"
      
    4. Save the file

      You can do this by pressing CTRL + X, Y, ENTER

  5. Create a shortcut in your Dash to easily launch the ADT:

    1. Open a terminal
    2. Execute the following command

      nano ~/.local/share/applications/adt.desktop
      
    3. Paste this:

      This can be done by right cliking inside your terminal window and then click Paste.

      [Desktop Entry]
      Version=1.0
      Name=Android ADT
      Comment=Launch the Android ADT
      Exec=/home/username/ADT/eclipse/eclipse
      Icon=/home/username/ADT/eclipse/icon.xpm
      Terminal=false
      Type=Application
      Categories=Development;IDE;
      

      Note: Replace username by your username. You can get your username by executing whoami in a terminal.

    4. Save the file
    5. Execute the following command to make it executable:

      chmod +x ~/.local/share/applications/adt.desktop
      

If you've done everything right you've now succesfully installed the Android ADT. Open your Dash and search for ADT. Click on Android ADT to check if it's working!

Louis Matthijssen
  • 11,885
  • 6
  • 44
  • 50
5

You can also install adt and android-sdk from this PPA.

sudo add-apt-repository ppa:linuxgndu/adt-raring
sudo apt-get update
sudo apt-get install adt android-sdk

To complete the installation of android-sdk you need to:

sudo sh /opt/android-sdk/install-sdk

You can also install android-studio:

sudo apt-get install android-studio

Now check that the installation went as expected:

android-sdk-manager
landroni
  • 5,941
  • 7
  • 36
  • 58
1

There is another alternative. Integrated Development Environments (IDEs) are supposed to make programming easier, one problem with them however is that it can be difficult to install the latest version of an IDE on a Linux system (Ubuntu) if they are not in the repos. Android Studio is one such IDE.

Android Studio is the official IDE for Android application development, based on IntelliJ IDEA. On top of the capabilities you expect from IntelliJ, Android Studio offers: Flexible Gradle-based build system Build variants and multiple apk file generation Code templates to help you build common app features Rich layout editor with support for drag and drop theme editing lint tools to catch performance, usability, version compatibility, and other problems ProGuard and app-signing capabilities Built-in support for Google Cloud Platform, making it easy to integrate Google Cloud Messaging and App Engine.

Extracted from: http://developer.android.com/tools/studio/index.html

Follow this procedure:

  1. Firstly execute the following command.

sudo add-apt-repository ppa:ubuntu-desktop/ubuntu-make

  1. Then update the repo.

sudo apt-get update

  1. Now install the software:

sudo apt-get install ubuntu-make

  1. You will see all the package it will install, type ‘y’ to tell Ubuntu to proceed with the installation. Once you are done with it. Proceed with the following.

umake android

Leave the installation path as the default value;

Press enter again. You will have to agree to the license by typing ‘a’ then download starts.

Android Studio will then present you with a wizard, just keep hitting next and agree to the license. It will then proceed to download requirements for Android development, such as the latest Android SDK. Click on ‘Finish’ once the installation of required packages is complete.

Du-Lacoste
  • 176
  • 4
0

CLI approach

Tested on Ubuntu 15.10, Android 22.

One the device:

Then:

sudo apt-get install ant gradle openjdk-7-jdk

cd

# Get device permissions.
# MANUAL find vendor ID on this table: http://developer.android.com/tools/device.html#VendorIds
# http://stackoverflow.com/a/5510745/895245
VENDOR_ID='054c'
UDEV_PATH='/etc/udev/rules.d/51-android.rules'
echo 'SUBSYSTEM=="usb", ATTR'"$VENDOR_ID"'=="0bb4", MODE="0666", GROUP="plugdev"' | sudo tee "$UDEV_PATH"
sudo chmod a+r "$UDEV_PATH"
sudo /etc/init.d/udev restart

wget http://dl.google.com/android/android-sdk_r24.4.1-linux.tgz
tar -xvf android-sdk_r24.4.1-linux.tgz

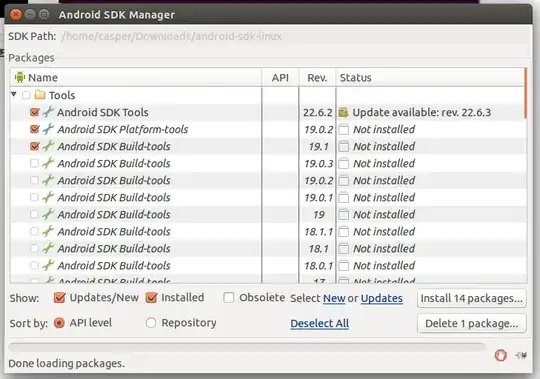
# MANUAL run the ./tools/android GUI and install the SDK versions you need 
# Better: just download EVERYTHING to save you annoyances later on.
# Yes, it takes a ton of space (50Gib+).
# http://stackoverflow.com/questions/17963508/how-to-install-android-sdk-build-tools-on-the-command-line
# The automated command line should look something like:
#API=22
#N="$(android list sdk --all |& grep 'SDK Platform Android' | grep "API $API" | cut -d- -f1)"
#android update sdk -u -a -t $N

# Studio
wget https://dl.google.com/dl/android/studio/ide-zips/1.5.1.0/android-studio-ide-141.2456560-linux.zip
unzip android-studio-ide-141.2456560-linux.zip
cd android-studio/bin
./studio.sh

# NDK
wget http://dl.google.com/android/ndk/android-ndk-r10e-linux-x86_64.bin
chmod a+x android-ndk-r10e-linux-x86_64.bin
./android-ndk-r10e-linux-x86_64.bin
mv android-ndk-r10e android-ndk

Add to your ~/.profile: TODO: which of those are actually necessary?

export ANDROID_SDK="$HOME/android-sdk"
# Present on the default build.xml generated by "android create project [...] in Android 22.
export ANDROID_HOME="$ANDROID_SDK"
export ANDROID_NDK="$HOME/android-ndk"s
export ANDROID_NDK_ROOT="$ANDROID_NDK"
# Used by https://github.com/googlesamples/android-ndk/tree/3cd41e1f5280443665ca98463c7a76e80bf0b96c/native-codec
export ANDROID_NDK_HOME="$ANDROID_NDK"
export ANDROID_ABI='armeabi-v7a'
export ANDROID_JAVA_HOME="$JAVA_HOME"
export ANDROID_STUDIO="$HOME/android-studio/"
export PATH="$ANDROID_SDK/platform-tools:$ANDROID_SDK/tools:${ANDROID_STUDIO}/bin:${ANDROID_NDK}:${PATH}"

Logout and login. You may need:

sudo "$(which adb)" kill-server
sudo "$(which adb)" start-server

Test the installation

Get your hands on a minimal project like this one or look under $ANDROID_SDK/samples/.

If it is an Ant project (contains a build.xml file) run:

ant debug
ant installd

If it is a Gradle project (contains a gradlew file) run:

./gradlew assembleDebug
./gradlew installDebug

The app should be installed on your device.

Studio (ADT successor) can be launched with:

studio.sh

NDK samples can be found under $ANDROID_NDK/samples and you can build and install them with:

ndk-build
# Create build.xml, as per: http://stackoverflow.com/questions/5572304/how-to-build-the-android-sample-projectsusing-ant-build-xml-does-not-exist
android update project -p . -t android-22
ant clean
ant debug
ant installd

State of official Debian packages

There is currently no official Debian package.

But there is a Google Summer of Code 2015 project trying to solve that: https://www.google-melange.com/gsoc/project/details/google/gsoc2015/seamlik/5707702298738688

  • I'm not even sure why you logout and back in. you can just source the variables if you make the proper changes in your .bashrc file. for instance, function cat_export_vars () { cat <<- _EOF_ (export directives) _EOF_ } and then just use cat_export_vars >> .bashrc and then . .bashrc or source .bashrc which does the same thing. Better yet, this would be better as a script to set up a bare bones Android SDK. –  Jun 29 '16 at 18:48
  • @jargonjunkie logout / login: sure, that would work too. I just prefer to have some variables in .profile so they are visible to things launched from dashboard. Script: this is as close as I could get, note that there are some manual steps marked which I could not automate. https://www.google-melange.com/archive/gsoc/2015/orgs/debian/projects/seamlik.html is our current best hope. – Ciro Santilli OurBigBook.com Jun 29 '16 at 18:59