According to the TeX Live website TeX Live 2014 was released one week ago (14 June 2014). How do I upgrade from TeX Live 2013 to TeX Live 2014 on Ubuntu 14.04 ?
Asked
Active
Viewed 1.5k times
16
1 Answers
15
Download the "netinstaller" for TeXLive
install-tl-unx.tar.gzfrom any CTAN mirror, e.g. this one.This "netinstaller" is not a full download, but just a small executable and will download all packages from the internet based on the requirements you set later. For more information, see the install guide.
Extract it somewhere, e.g. in
~/texlive/2014.mkdir ~/texlive/2014 cd ~/texlive/2014 tar -xf /path/to/install-tl-unx.tar.gz cd install-tl-20140831 # depends on your installer version, adjust to your situationRun the
install-tlbinary with root privileges, e.g. (adjust to your situation):sudo ./install-tlNote: If you have a single-user machine, or don't have root privileges, I would recommend installing to your home directory instead (omit
sudoin the previous command). The reason is that commands liketlmgr(see below) will not work out of the box if they are run withsudo, see Setting TeX Live path for root for more information.Optionally:
- Add the
-select-repositoryoption in order to select a CTAN mirror nearby before downloading anything. - Add the
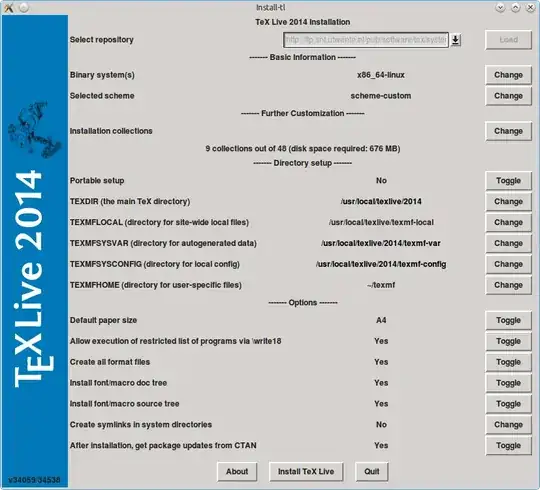
-gui=perltkoption to use a GUI installer. Install theperl-tkpackage first! (sudo apt-get install perl-tk) See the screenshot below how it should look like. - Configure only specific collections by choosing the menu option C to save bandwidth and space. Be warned: the default set of 47 collections will yield more than 2GB of traffic and disk usage. You can always install more collections later with the TeXLive package manager (
tlmgr) and thecollection--prefixed meta-packages.
- Add the
Choose I for install in the menu. (If not in GUI mode)
It installs in
/usr/local/texlive/2014by default.The installer output suggests to adjust some environment variables. Do so by editing your
~/.profile(or~/.bashrcif you like) and add the following lines:TEXDIR="/usr/local/texlive/2014" export PATH=$TEXDIR/bin/i386-linux:$PATH # for 32-bit installation export PATH=$TEXDIR/bin/x86_64-linux:$PATH # for 64-bit installation export INFOPATH=$INFOPATH:$TEXDIR/texmf-dist/doc/info export MANPATH=$MANPATH:$TEXDIR/texmf-dist/doc/manLog out and log back in to receive the new variables, or, source the file, e.g.
source ~/.profileto activate it for your current shell. This last step should make sure your application actually use your new 2014 local TeXLive installation rather than the Ubuntu packaged one. Some tools will require you to configure that yourself, see for example this on TeXWorks.Here's how the GUI installer looks like:
Finally, to install new packages you need to setup a Texlive package database (TLPDB). See this post for more information. In summary, you have to run:
sudo apt-get install xzdec
sudo tlmgr init-usertree
then you can install a new package, for example, to install package
wrapfig, run:sudo env PATH="$PATH" tlmgr install wrapfigor if you installed in your home directory, you can omit
sudo:tlmgr install wrapfig
Håkon Hægland
- 3,973
- 12
- 46
- 80
-
2this is correct. You can use
tlmgr update --selfandtlmgr update --allto keep your installation up-to-date. – puredevotion Jun 30 '14 at 17:15 -
1The 2014 release is not yet available from the repositories, so right now a manual install is the only way to do it. The downside to this approach is that you will to manage the updates yourself. – Luís de Sousa Jul 07 '14 at 12:01
-
1Is it available from repositories yet? If not, when? Do I have to add some PPA or will it be available as a "normal" update in Ubuntu 14.04 LTS? Thanks. – Slazer Jul 27 '14 at 14:41
-
1Make sure to set the required collections with the
Coption in the menu, otherwise it downloads 2896 packages and takes 20 minutes on my 100Mbit internet connection... I don't want to install all TeXLive packages... – gertvdijk Sep 01 '14 at 08:59 -
You will probably need to "fake" the installed packages to avoid the dependency system installing duplicate versions of the tex system if you install something depending on tex. See http://tex.stackexchange.com/a/95373/38080 – Rmano Mar 19 '15 at 19:50
-
1sudo tlmgr init-usertree does not work for me ("command not found"), but running it without sudo works. – Julian Schuessler Nov 16 '15 at 16:15
-
@JulianSchuessler Yes you are right, thanks for pointing it out. See my updated answer for an explanation and a solution. – Håkon Hægland Apr 18 '16 at 19:10
tlmgr:tlmgr: The TeX Live versions supported by the repository [...] (2014--2014) do not include the version of the local installation (2013).– gertvdijk Sep 01 '14 at 08:53tlmgr --versionsays2014buttlmgr update --selfandtlmgr update --allgive the error from your first comment. All latex commands work fine, and use/usr/local/texlive/2014/bin/..so I guess I'm ok for now. Any clarification on thetlmgr updateerror would be helpful. – modulitos Oct 21 '14 at 03:44tlmgr --versionandtex --versionboth report 2014, but I get theThe TeX Live versions supported by the repository [...] (2014--2014) do not include the version of the local installation (2013)error. – Roly Oct 29 '14 at 15:55